The Actual Starbucks Whipped Cream Recipe
Starbucks whipped cream has gotten complicated with all the copycat recipes flying around. I spent three months trying to nail it at home before realizing I’d been doing it completely wrong — using a hand mixer, splashing in vanilla extract, wondering why it tasted flat and looked weirdly dense. Then a Starbucks manager friend set me straight. It’s not hand-whipped at all. It’s made in a canister with nitrous oxide.
Today, I will share it all with you.
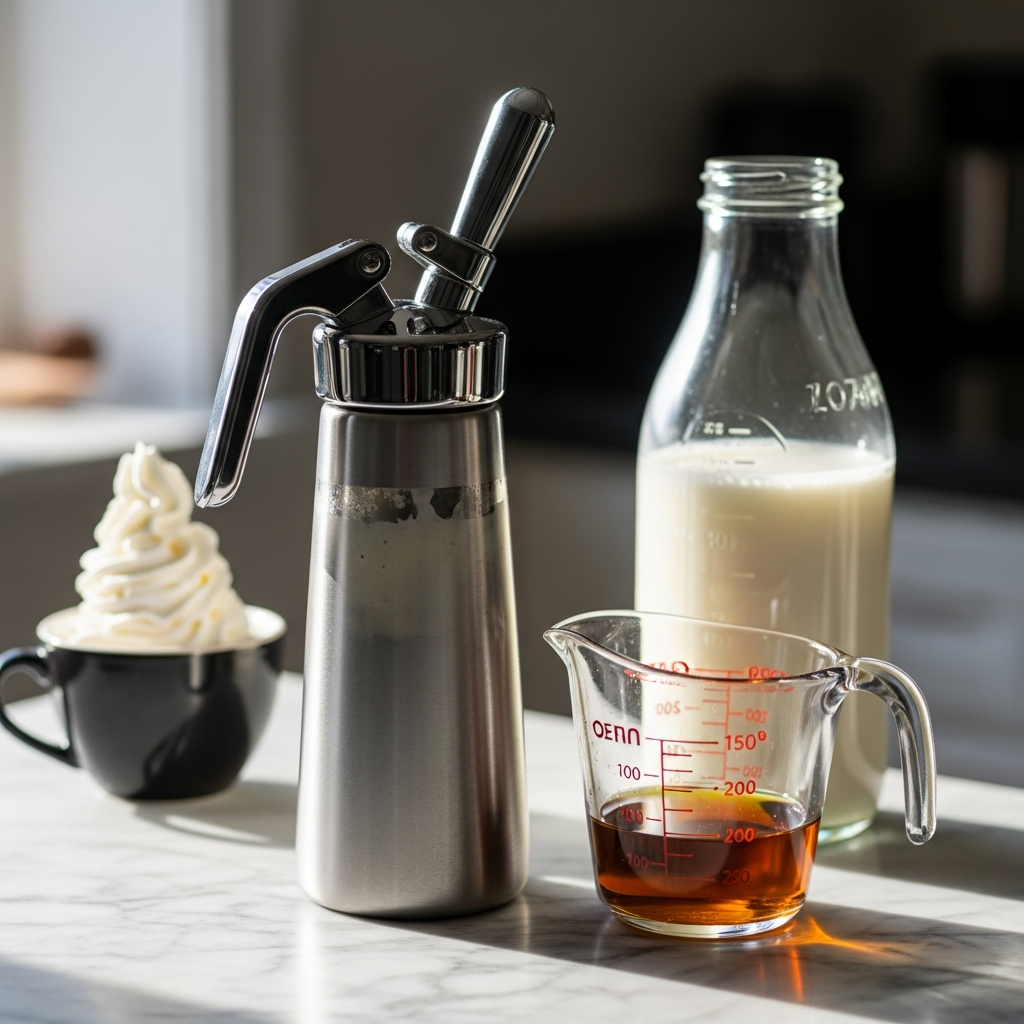
The formula itself is almost embarrassingly simple. One cup of heavy whipping cream. Two pumps of Starbucks vanilla syrup — roughly one tablespoon. Pour both into a whipped cream dispenser, seal the lid, charge it with a single N2O cartridge, shake three to four times. Done. That’s the whole thing. The result is exactly what lands on top of your Frappuccino or hot chocolate at any Starbucks location.
But why N2O and not CO2? In essence, it comes down to fat chemistry. But it’s much more than that. Nitrous oxide dissolves directly into the fat molecules in cream, creating tiny, stable bubbles — light, airy, almost cloud-like on your tongue. CO2 produces larger, more aggressive bubbles that collapse faster and taste noticeably sharper. Starbucks uses N2O exclusively. Swap in CO2 and you’re making a fundamentally different product.
The ratio matters more than people realize. I’ve seen recipes calling for a full bottle of vanilla syrup. I’ve seen others suggesting “just a splash.” Both are wrong. Two pumps per cup hits the exact sweetness level Starbucks uses — not cloying, not bland. It matches what goes on drinks every single day across thousands of locations.
This isn’t hand-whipped cream. That’s the critical distinction. Hand-whipping breaks down cream structure differently — you end up with something denser, warmer from friction, slightly separated-looking. Canister whipped cream stays perfectly uniform. Once you taste the side-by-side difference, the hand-whipped version feels almost heavy. That’s what makes the canister method endearing to us home baristas who actually want the real thing.
What You Actually Need — No Substitutions on These
Probably should have opened with this section, honestly.
While you won’t need a commercial espresso rig or a food science degree, you will need a handful of specific tools. Equipment first. You need a whipped cream dispenser — the iSi Gourmet Whip or the Mosa are the two most common models that replicate what Starbucks uses in-store. They run between $30 and $50. I’ve had my iSi for four years. Worth every cent.
N2O chargers come in packs of 10 or 24 on Amazon. A box of 24 runs about $15. That’s roughly 60 cents per charge. Starbucks charges you $0.75 extra just to add whipped cream to a drink — so you’re already coming out ahead by the second use.
Heavy whipping cream might be the best option, as this recipe requires fat content of 36% or higher. That is because the fat is literally what holds the N2O charge and creates that stable foam structure. Light cream won’t hold the gas properly. You’ll get runny, watery output. I learned this the hard way after grabbing the wrong carton — the one in the nearly identical container right next to the right one. Don’t make my mistake.
First, you should track down actual Starbucks vanilla syrup — at least if you want an accurate result. It’s in most grocery store coffee aisles, or on Amazon under “Starbucks Flavoring Syrup, Vanilla, 12.17 oz.” This is not vanilla extract. Extract won’t dissolve properly in cold cream. It sits there bitter and slightly separated, which kills the whole thing. Syrup dissolves smoothly. Tastes exactly right.
I’m apparently sugar-free about everything these days, and the Starbucks sugar-free vanilla syrup works for me while the regular version never feels necessary anymore. The texture is nearly identical. Taste is maybe 95% the same. I’ve swapped them out at parties without anyone noticing.
How to Charge and Dispense It Correctly
So, without further ado, let’s dive in.
Pour one cup of cold heavy cream into the canister. Add two pumps of vanilla syrup. Give it a gentle stir. Seal the canister lid — thread it all the way down. Screw the charger holder onto the base and insert one N2O cartridge. You’ll hear a short hiss as the gas enters. That’s the sound you want.
Shake the whole canister three to four times. Not hard. Not aggressively. You’re distributing gas evenly — not aerating. Over-shaking breaks down the foam structure and produces watery output. Three gentle shakes. That’s the move.
Refrigerate the charged canister for at least 15 minutes before dispensing. Cold cream holds the charge significantly better. Warm cream releases gas too fast and comes out thin. Starbucks keeps their canisters on ice throughout service shifts for exactly this reason. Non-negotiable step.
When dispensing, hold the canister completely upside down. Use short bursts — don’t hold the trigger down continuously. Short bursts give you that perfect, rounded dollop texture you recognize from the cup.
The charged canister stays good in the fridge for up to five days. Baristas refill the same canisters throughout their entire shift. Gas doesn’t escape when it’s properly sealed. Charge once, use for days. This is genuinely standard commercial kitchen practice.
Where Starbucks Whipped Cream Actually Goes Wrong at Home
Watery output is the most common failure — almost always caused by cream that wasn’t cold enough when loaded, or fat content below 36%. Refrigerate your cream before pouring. Use the highest fat percentage you can find. That alone fixes it roughly 95% of the time.
No output at all usually means the charger wasn’t fully punctured or the canister lid isn’t sealed. Check that the threads go all the way down and that the charger holder is actually tight. A loose connection means zero pressure.
Tastes wrong? You used extract instead of syrup. Or the ratio is off. Or — and this one stings — you grabbed a generic vanilla syrup instead of the actual Starbucks product. Not all vanilla syrups taste the same. The difference is noticeable. Stick to the official product.
Most people don’t fail on technique. They fail on cream quality and syrup choice. The method itself is almost foolproof once the ingredients are right.
Matching the Whipped Cream to Specific Starbucks Drinks
Frappuccinos get a standard swirl on top. Hold the canister inverted and do one smooth spiral across the surface. Hot drinks — hot chocolate, mochas, lattes — get a heavier dollop, roughly two ounces on top.
Cold Brew with Cold Foam is a completely different animal. Cold foam is nonfat milk blended at high speed — not this recipe. Don’t confuse them. That’s a separate technique entirely and a separate article.
The layering technique baristas use is easier than it looks. Charge your canister, hold it inverted, practice on a mug of coffee. Within two attempts you’ll have it. Hold the canister at a slight angle and let the cream flow in one continuous motion — stopping and starting mid-swirl is what breaks the shape.
You can find more detailed variations on our full Starbucks whipped cream recipe guide, which covers seasonal drinks and custom requests. But this base formula — one cup heavy cream, two pumps vanilla syrup, one N2O charger — works for every standard Starbucks drink that comes with whipped cream on top.