Why your Gaggia Classic Pro steam wand stopped frothing
I owned a Gaggia Classic Pro for three years before the steam wand completely stopped frothing milk. The machine still had steam coming out—plenty of it, actually—but it wasn’t aerating anymore. Just hot water dribbling through. That’s the specific problem we’re solving here, because the Gaggia Classic Pro steam wand not frothing milk fix isn’t always about a clogged tip.
Most people assume a blocked steam wand tip means no milk froth. That’s partially true. But here’s where it gets more complicated with all the misinformation flying around: the Classic Pro has an internal solenoid valve design that handles steam distribution, and this valve fails in a very particular way on budget espresso machines. You get steam pressure—the gauge shows it fine—but the aeration holes on the wand don’t produce that signature whistle-and-bubble action anymore.
Steam flow and milk aeration are actually separate problems, which caught me completely off guard. Steam flowing means the boiler is generating pressure and pushing steam through the pipes. Aeration means that steam is hitting milk at the right angle and velocity to create the texture you actually want. The Gaggia Classic Pro’s internal valve controls which way the steam prioritizes—full force or aerating force—and it gets stuck. When it sticks in “full force mode,” you’re essentially running a pressure relief that bypasses the aeration holes entirely.
Probably should have opened with this section, honestly. I spent two weeks thinking my wand tip was permanently damaged before I learned the valve was the culprit. Don’t make my mistake.
Check if it’s actually the internal valve or just a blocked tip
Testing this takes five minutes, and you’ll actually know something definitive instead of guessing.
You need a cup filled with cool water or milk and your steam knob. That’s it.
First, remove the steam wand tip completely. It unscrews—usually counterclockwise—and requires maybe a quarter turn of force. On my Classic Pro, the tip came off with a slight twist. Some models have a tiny brass collar holding it tight. Look for that before you force anything.
Now turn on the steam knob without the tip attached. Let steam run directly into your cup. If steam flows freely and powerfully, that’s diagnostic. Your internal valve is probably fine. The blockage lives in the tip itself.
If steam barely trickles out—even without the tip—or comes out inconsistently with sputtering sounds, you’ve found the real culprit. That’s the internal solenoid valve failing. The Gaggia Classic Pro uses a specific three-way valve design (Gaggia part number 996530019 on most models), and the plunger mechanism inside gets stuck from mineral buildup or corrosion.
My machine did the second thing. Steam pressure showed 1.2 bar on the gauge, but literally nothing came out when I opened the knob. I had to lean close to hear a faint hissing sound.
If your wand is dripping water instead of steam — at least if you’re certain the boiler is hot — that’s a different issue entirely. Usually means the boiler hasn’t come up to temperature. Wait 30 seconds and try again.
How to clean the internal valve without taking the whole machine apart
You have options here, ranked by difficulty and effectiveness.
The backflush method first. If you caught the problem early and the valve isn’t completely stuck, backflushing can restore 60–70% of function. Turn off the machine and let it cool slightly. Unscrew the steam wand tip. Now run cold water through the wand with the steam knob turned all the way open. Let it flow for 10–15 seconds while you watch the water. This forces water backward through the internal passages and can dislodge early-stage mineral deposits. Repeat this five times. It’s worth trying before anything else, since you’ve already got the tip off.
Backflushing didn’t work for me, so I needed to access the valve itself.
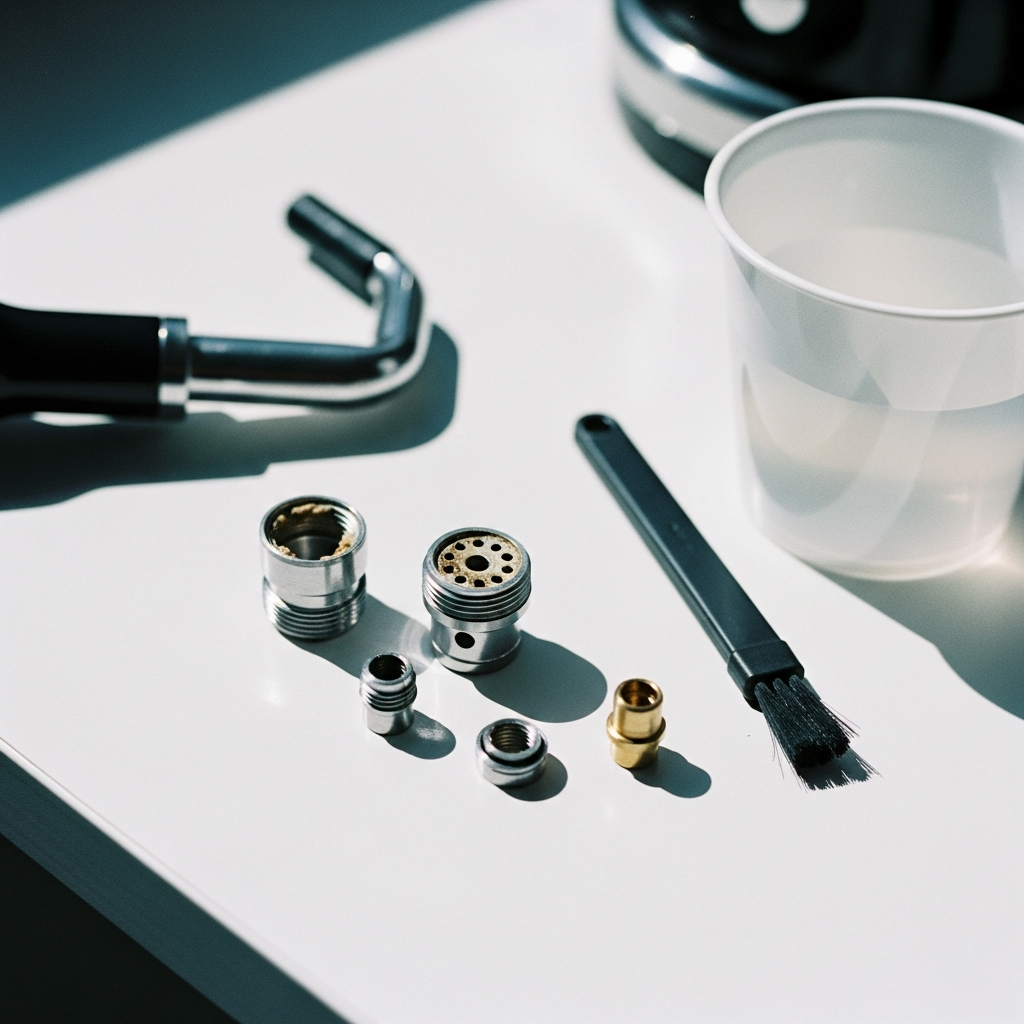
On the Gaggia Classic Pro, the steam valve lives behind the group head, inside that aluminum casting. You’ll see a small brass fitting with a hex nut—that’s part of your steam circuit. The three-way valve has a removable solenoid plunger on top (it’s the part that looks like a small bullet with wires attached). You can unscrew this without disassembling the entire machine, which is what I love about this design.
Here’s what I did: unplugged the machine completely. Waited 30 minutes for the boiler to cool down fully. Then unscrewed the solenoid from the valve body using a 13mm wrench. Inside that solenoid is a spring, a plunger, and a small O-ring. All of these collect mineral scale over time.
Soak each component in white vinegar for 45 minutes. I used a small cup and made sure everything was fully submerged. The acidity dissolves mineral buildup without damaging the brass or rubber parts. After soaking, rinse everything under cold running water and reassemble in reverse order. Make sure the spring goes back in the same orientation—pointed end down, flat end up.
Reattach the solenoid and run the steam knob for 30 seconds (before filling the boiler with water again) to clear any vinegar residue from the internal passages. The smell is unmistakable when you’re clearing it out.
This method works about 80% of the time for the Gaggia Classic Pro specifically. The valve usually comes back to life almost immediately — within the first 10 seconds of steam flow.
When to just replace the valve instead
Sometimes the internal plunger is so corroded that soaking doesn’t help. You’ll know this happened if, after cleaning, steam still barely flows. At that point you’re looking at part replacement, which honestly isn’t the end of the world.
The OEM three-way solenoid valve for the Gaggia Classic Pro costs about $45–$65 depending on where you buy it. CoffeeParts.com or direct from Gaggia has the correct part number (996530019 or 996530001 for slightly different years). Shipping typically adds another $8–$15, so budget around $60 total.
Installation takes 20 minutes if you’re careful and have a 13mm wrench. You unscrew the old valve body from that brass fitting behind the group head, pull out all the internal components (springs, plungers, seals), and slide them into the new valve body. Some people prefer to buy a complete pre-assembled replacement valve, which costs more ($80–$100) but eliminates reassembly confusion.
I chose the cleaning route because I found the original valve had only minor pitting. But if you’re impatient or the machine is out of warranty anyway, replacement is faster than troubleshooting. Figure 30 minutes total if you order expedited shipping and already have basic tools on hand.
How to prevent this from happening again
Once your steam wand works again, a simple maintenance habit prevents the whole thing from recurring — and I’m apparently lazy about routine maintenance, so I built this into my muscle memory.
After every steaming session—even if you only steam for 20 seconds—purge the steam wand. Turn on full steam for 2–3 seconds into an empty cup or towel. This forces residual water out of the valve body before it can sit and calcify. I do this automatically now. Takes 30 seconds, costs nothing, and I haven’t had a repeat problem in two years.
Every two months, run a backflush with cold water as preventative maintenance (same method as earlier). It keeps mineral deposits from building up in the first place before they become a problem.
On the Gaggia Classic Pro specifically, descale the entire machine every 3–4 months if you’re in a hard water area. I’m in Denver where the water is brutal — I do it monthly using Gaggia’s recommended descaling solution (about $8 per bottle from Amazon). This isn’t just for the boiler—the minerals travel through every pipe in the machine, including that steam circuit you just fixed.
Finally, replace the steam wand tip every 12–18 months. The tiny aeration holes gradually enlarge from constant steam pressure, and you lose microfoam quality before you lose froth entirely. A replacement tip costs $12 and takes 15 seconds to install. CoffeeParts has them in stock usually.
Your Gaggia Classic Pro’s steam wand isn’t broken permanently. That internal valve just needs some attention.