Why the Descale Reminder Matters
The Keurig K‑Select’s descale reminder appears when calcium deposits (scale) have built up inside the heating element and other internal parts. Scale can hinder performance and affect coffee taste. The reminder will only disappear once the machine has actually been descaled. If postponed, it reappears in six weeks. Descaling every 3 to 6 months is recommended, especially in hard‑water areas. Source.
What You Need Before You Start
- One full bottle of Keurig Descaling Solution (official Keurig product)
- Fresh tap water
- Large ceramic mug (not paper)
- Access to a sink
- Time: about 45 minutes total
- Empty the 52‑ounce removable side water reservoir and remove the Keurig Water Filter if installed
- Ensure no K‑Cup pod is in the brewer at any point
Important Clarification: No Descale Mode Button Combo
The K‑Select is an RM Reservoir brewer. It does not have a button‑combination to enter a Descale Mode. Instructions that involve holding the 8 oz and 12 oz buttons together apply only to newer models such as the K‑Supreme, K‑Express, and K‑Iced. Source.
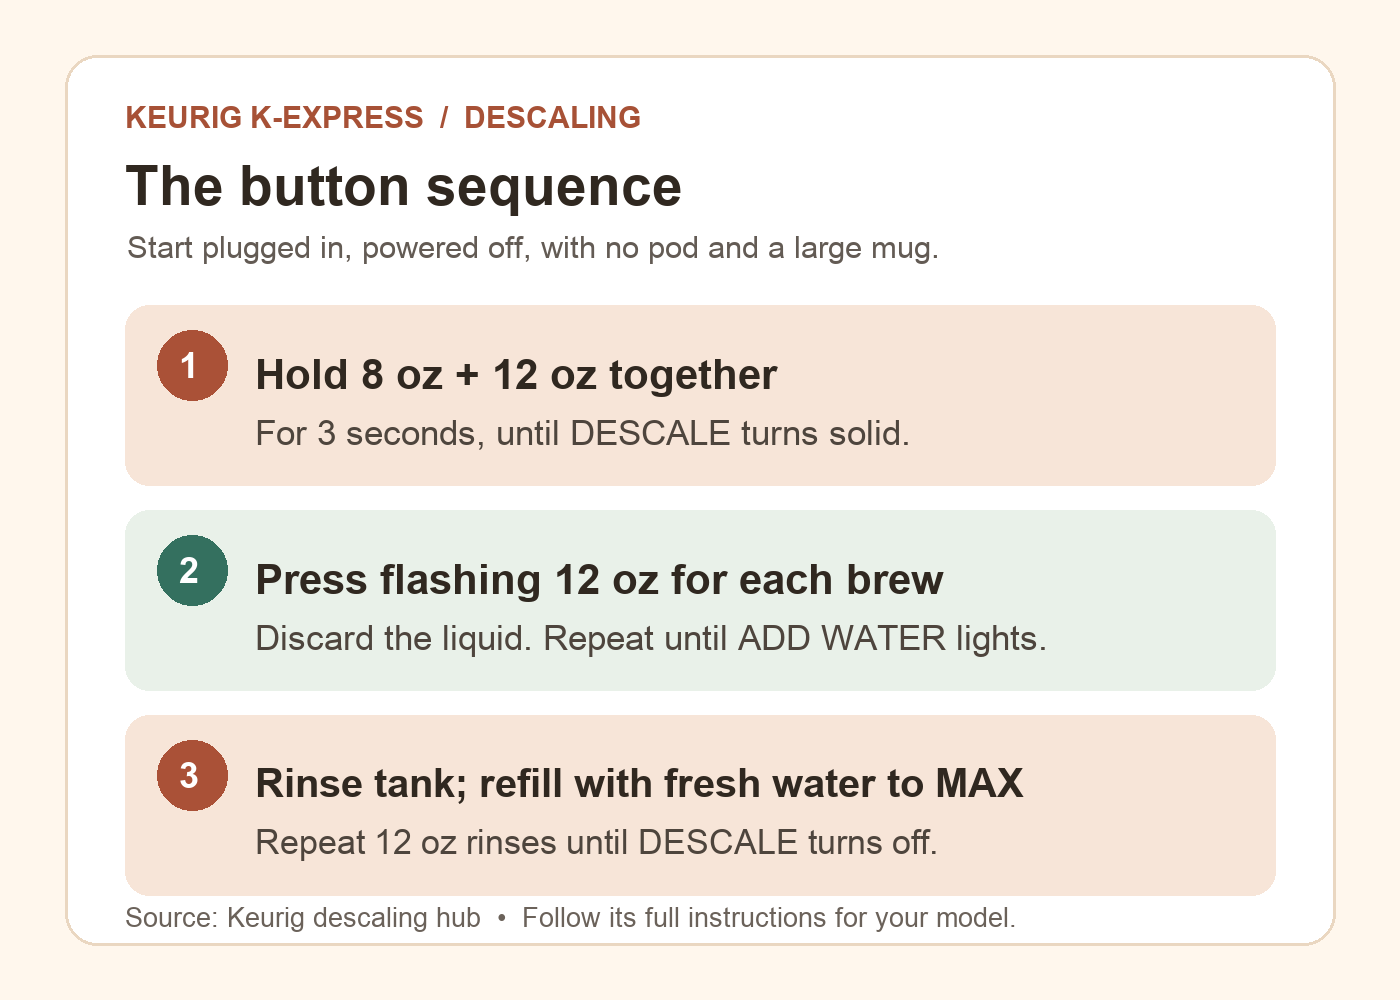
Step‑by‑Step Descaling Procedure
- Before You Begin – Allow approximately 45 minutes. Empty the water reservoir completely. Remove the Keurig Water Filter if installed. Gather a large ceramic mug, fresh water, and a full bottle of Keurig Descaling Solution. Ensure no K‑Cup pod is in the brewer. Source.
- Step 1 – Solution Prep – Press the power button to turn the brewer off. Pour the entire bottle of Keurig Descaling Solution into the emptied reservoir. Fill the empty bottle with water and pour that into the reservoir. Press the power button to turn the brewer back on. Source.
- Step 1 (continued) – Cleansing Rinse – Place a large ceramic mug on the drip tray. Lift and lower the brewer handle (no K‑Cup pod). Select the largest brew size. Press the BREW button. Pour the hot liquid into the sink. Repeat until the ADD WATER light illuminates. Source.
- Step 2 – Internal Tank Soak – Leave the brewer powered on. Do not turn it off. Let it stand for at least 30 minutes while still on. After 30 minutes, discard any residual solution from the reservoir and rinse the reservoir thoroughly. Source.
- Step 3 – Fresh Water Rinse (Part 1) – Fill the reservoir with fresh water to the MAX fill line. Place a large ceramic mug on the drip tray. Lift and lower the handle (no K‑Cup pod). Select the largest brew size. Press BREW. Pour the hot liquid into the sink. Source.
- Step 3 – Fresh Water Rinse (Part 2) – Continue running rinsing brews until you complete at least 12 total (largest brew size, no K‑Cup pod, large ceramic mug, pour into sink). Refill the reservoir to MAX as needed. After 12 brews, the brewer is ready to use. Source.
After Descaling
Once the 12 rinses are finished, the K‑Select’s descale maintenance reminder will clear. The machine is now ready for normal use. Remember to keep the descaling schedule—every 3 to 6 months—to maintain performance and taste. Source.
Key Takeaways
- The K‑Select uses a manual RM Reservoir descaling method, not a button‑combo Descale Mode.
- Descaling takes about 45 minutes and involves three distinct phases.
- Use only a large ceramic mug; paper cups are not allowed.
- Never place a K‑Cup pod in the brewer during the procedure.
- Leave the brewer powered on during the 30‑minute soak.
- Complete at least 12 fresh‑water rinses to finish the process.
Follow these steps exactly as outlined by Keurig, and your K‑Select will stay clean, efficient, and ready for great coffee every time.