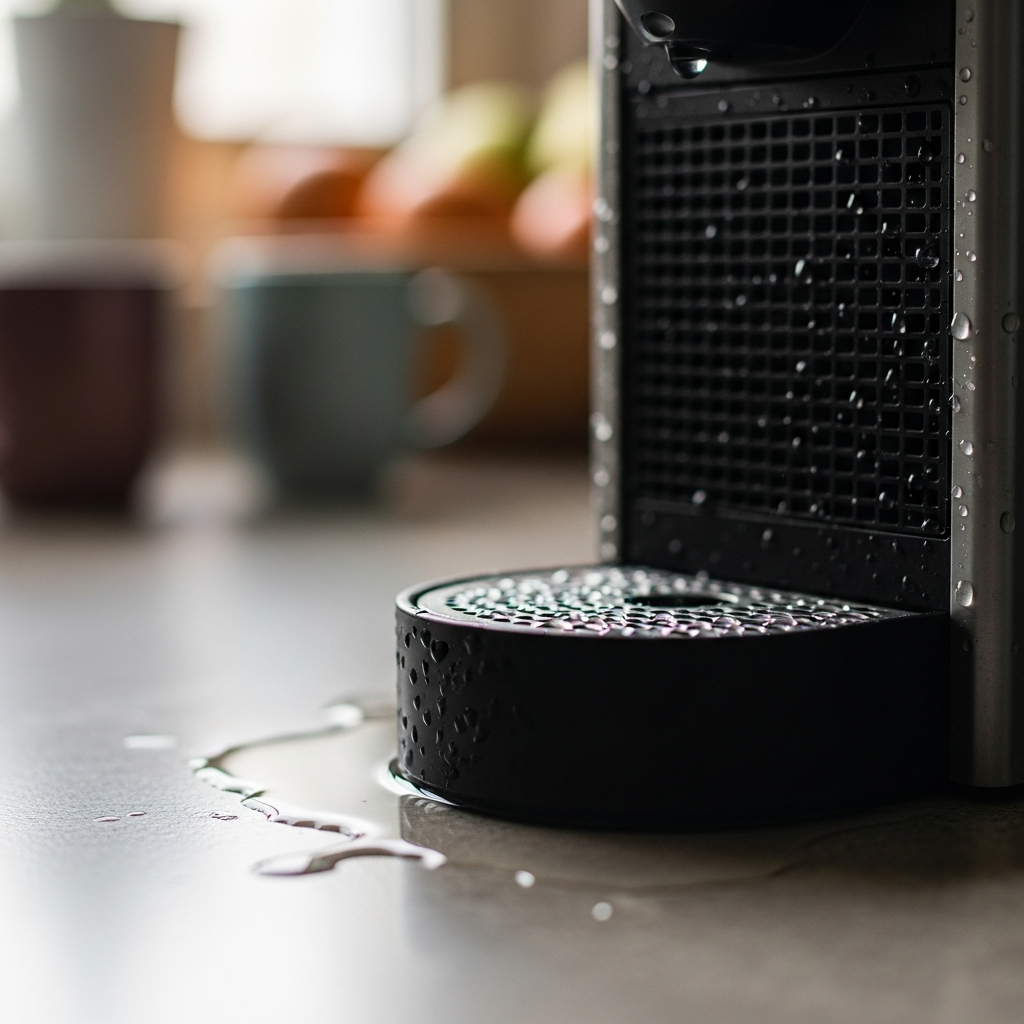
Nespresso water leaks have gotten complicated with all the vague troubleshooting advice flying around. As someone who dealt with a leak on my Vertuo Next last year — water pooling under the machine every single brew — I learned everything there is to know about tracking down and fixing these things. Today, I’ll share it all with you.
Here’s the thing about a leaking Nespresso: it’s not just annoying. Water pooling around an electrical appliance is a genuine safety concern, and the leak itself is a sign something needs fixing before it gets worse. My leak turned out to be a simple fix once I figured out where the water was actually coming from. That’s the key — finding the source.
Step 1: Identify Where the Leak Is Coming From
Before you start messing with anything, figure out exactly where the water is escaping. Grab a dry paper towel, lay it under and around the machine, run a brew cycle (or just water without a capsule). Check the towel after. Where’s the moisture concentrated?
- Under the machine toward the front: Probably the drip tray overflowing or a brew chamber seal problem.
- Under the machine toward the back: Water tank connection leak.
- Around the capsule/head area: Brew chamber seal or capsule insertion issue.
- Under the water tank specifically: Tank crack or valve leak.
- From the coffee outlet while idle: Internal valve not closing all the way.
Leaking from the Bottom of the Machine
Water pooling underneath is the complaint I hear most often, and the causes range from embarrassingly simple to actually serious.
Cause 1: Overfull drip tray (happens way more than you’d think)
I know. Sounds too obvious. But this is the #1 cause of “my Nespresso is leaking from the bottom.” The drip tray catches excess water from every brew, cleaning cycle, and descale run. Don’t empty it regularly? It overflows. Water pools underneath. Mystery “leak” solved.
Most trays have a red float indicator that pops up when full. Check yours right now. If that red thing is visible above the tray surface, there’s your answer. Empty and rinse it, then make a habit of checking every day or two.
Cause 2: Cracked drip tray
The plastic tray can develop hairline cracks over time, especially if it’s been dropped or handled roughly. Pull it out, fill it with water, set it on a paper towel for 10 minutes. Water on the towel? Cracked tray. Nespresso sells replacements for $10-15, or you can get a free one through support if your machine is under warranty.
Cause 3: Internal hose leak
If it’s not the drip tray and water’s genuinely coming from inside the machine, a silicone hose may have come loose or cracked. This shows up more in machines over 3 years old or ones that have been through tons of descaling cycles — the acid can degrade silicone over time.
Internal hose leaks aren’t really a DIY fix for most people. Under warranty? Get a replacement from Nespresso. Out of warranty and handy with small appliances? YouTube teardown guides exist for most models. Just know that opening the machine voids whatever warranty you have left.
Leaking from the Capsule Area During Brewing
Water or coffee dripping from around the head/lever while the machine is brewing? Brew chamber seal is the prime suspect.
Cause 1: Dirty or worn brew chamber seal
Every Nespresso has a silicone gasket or O-ring that creates the watertight seal between the chamber and capsule. Coffee oils, residue, and mineral deposits build up on this thing over time, preventing it from seating properly.
How to clean it:
- Turn off and unplug.
- Open the head to expose the brew chamber.
- Find the silicone seal ring. On Original-line machines it’s around the top of the capsule chamber. On Vertuo machines, around the circular rim of the brewing head.
- Wipe with a soft, damp cloth. Use a cotton swab for the crevices where coffee residue has built up.
- Stubborn buildup? Dampen the cloth with a little white vinegar. Don’t use soap — it leaves a film that actually makes the seal worse.
- Check for visible damage. Cracked, flattened, or deformed seal = needs replacing.
Cause 2: Capsule not seated correctly
On Original-line machines, the capsule has to drop cleanly into the holder. Tilted, or previous capsule didn’t eject properly? The head won’t close with a proper seal.
On Vertuo machines, capsule orientation matters. Flat/foil side up, dome side down. A tilted capsule keeps the head from closing fully, breaking the seal.
Cause 3: Used capsule stuck in the chamber
Sometimes the previous capsule stays jammed in there. You insert a new one on top, the head can’t close properly, and water leaks everywhere during brewing. Always open and close the head between brews to eject the used capsule. Look inside and confirm it’s empty before loading the next one.
Leaking from the Water Tank Area
Leak concentrated around where the tank connects? Problem’s either the tank itself or the connection point.
Cause 1: Tank not seated properly
Every model attaches differently:
- Vertuo Plus: Slides in from the back. Push straight in — don’t angle it — until it clicks. Should not wobble.
- Vertuo Next: Sits on the left side, connects via a port at the bottom. Make sure the valve aligns with the receiving port.
- Vertuo Pop: Goes on the back. Push down firmly.
- Original-line: Most use a rear-mounted tank that lifts off vertically. When reattaching, lower straight down rather than sliding.
Cause 2: Tank valve issue
There’s a small silicone valve at the bottom of every Nespresso tank that controls water flow. Stuck, dirty, or damaged valve = water leaking when the tank is attached.
- Remove the tank.
- Flip it upside down, find the valve. Press it gently — it should move freely and spring back.
- Rinse the valve area thoroughly under running water.
- Stuck? Soak the bottom in warm water for 10 minutes to dissolve mineral buildup.
- Dry everything before reattaching — both the valve area and the machine’s receiving port.
Cause 3: Cracked water tank
Thin plastic. Drops, thermal stress from filling with very hot water, or just age. Inspect carefully — hairline cracks are easy to miss. Fill the tank, set it on a paper towel away from the machine, wait 15 minutes. Water on the towel? Cracked. Replacements run $10-20 on Nespresso’s website depending on model.
Leaking When the Machine Is Idle (Not Brewing)
Finding water around your Nespresso when you haven’t used it? That’s the puzzling one.
Cause 1: Internal valve not sealing
The solenoid valve controls water flow during brewing. When it works right, it shuts completely between brews. Mineral deposits preventing it from fully closing? Water slowly seeps through and drips from the outlet, even with the machine off.
Descaling can sometimes clear the deposits and let the valve close properly. If descaling doesn’t fix it, the valve may need professional replacement.
Our Nespresso cleaning cycle guide has detailed descaling instructions.
Cause 2: Condensation
Not actually a leak, but people mistake it for one constantly. After brewing, the thermoblock is hot. As it cools, condensation forms on internal surfaces and drips out. A small amount of water in the drip tray area after cooldown is normal — especially in humid climates.
Cause 3: Overfilled tank
Fill above the max line and water can overflow when the machine heats up and internal pressure bumps slightly. Always fill to the line and no higher.
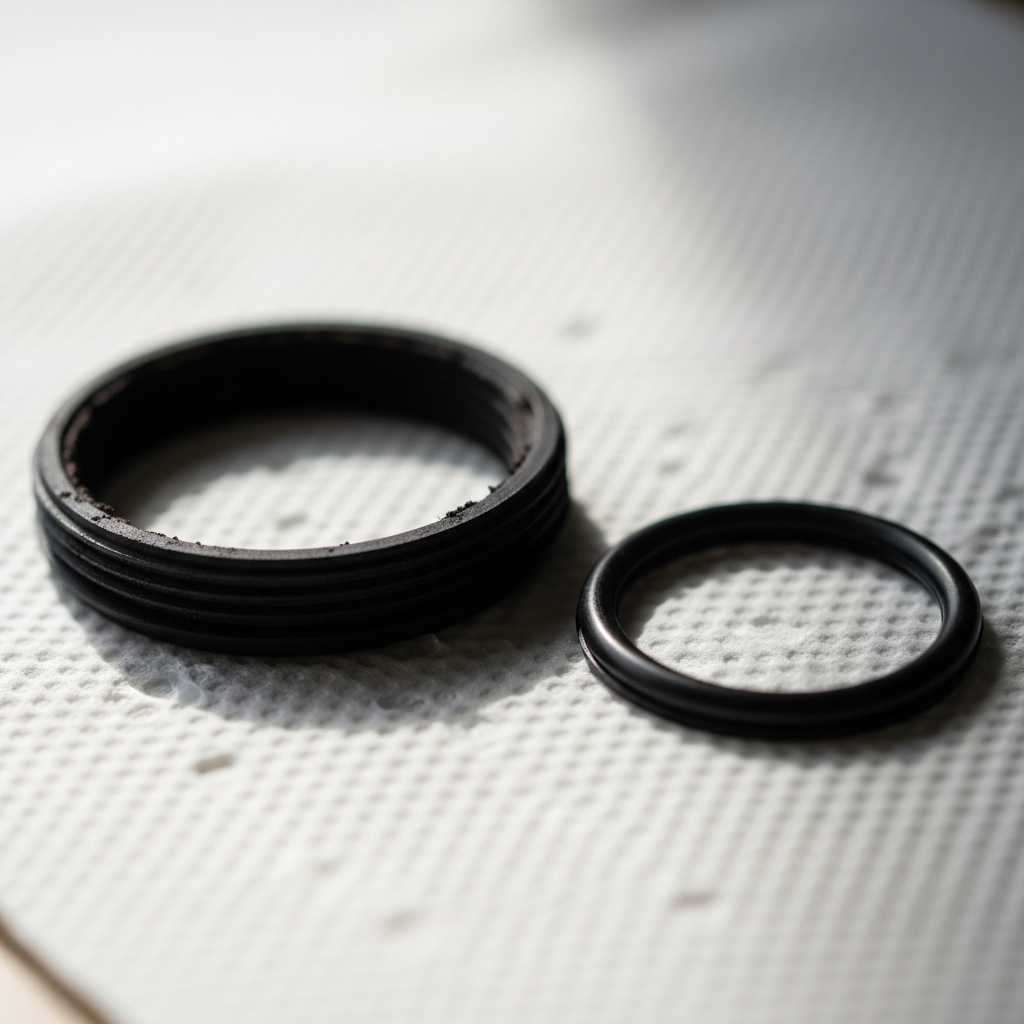
O-Ring and Gasket Replacement
If cleaning the seal doesn’t stop the capsule-area leak, you probably need a new O-ring or gasket.
Original-line O-rings: Nespresso Original machines (Pixie, CitiZ, Essenza Mini, etc.) use standard silicone O-rings. Replacements on Amazon run $5-8 — just search your specific model number. Swap is dead simple: pull the old one out of its groove, push the new one in. No tools.
Vertuo seals: More complex thanks to the centrifusion setup. Replacing Vertuo seals at home is possible but more involved — you’d need to remove the brew head assembly. For most people, calling Nespresso for a warranty replacement or professional repair is the smarter move.
Lattissima and Creatista: These have additional seals around the milk system connections. Leak from the milk system area? Check the milk container seal and outlet gasket. Usually removable — soak in warm water, reattach.
Proper Capsule Insertion to Prevent Leaks
Improper capsule insertion causes more leaks than people realize, especially if you’re newer to Nespresso.
Original-line capsules:
- Lift the lever to open.
- Drop the capsule in, flat/foil end facing up toward the needle.
- Don’t force it down — it should fall into the holder on its own.
- Close the lever firmly until it clicks.
- Lever won’t close smoothly? Open and reposition the capsule. Forcing the lever damages the seal.
Vertuo capsules:
- Open the head by lifting the lever or pressing the release (varies by model).
- Place the capsule flat/foil side up, dome side down.
- Make sure it’s centered and not tilted or sitting on top of a stuck old capsule.
- Close the head. Should close smoothly and lock. Resistance? Open and check for obstructions.
When to Contact Nespresso Support
Call them if any of this applies:
- Water from the bottom that’s not the drip tray — internal hose issue, needs professional repair.
- Brew chamber seal is visibly damaged and you can’t find a replacement.
- Descaling doesn’t stop the idle dripping (valve failure).
- Cracked tank under warranty — they’ll send a replacement.
- Leak accompanied by error lights or strange sounds.
- Machine is under 2 years old — warranty, and Nespresso usually replaces at no cost.
For a broader look at all Nespresso problems and solutions, visit our Nespresso troubleshooting hub.
Preventing Leaks
Most Nespresso leaks are preventable. Here’s what I do now after dealing with my own:
- Empty the drip tray every 1-2 days. Prevents the #1 “leak” of all time.
- Wipe the brew chamber seal weekly. Quick swipe with a damp cloth keeps residue from wrecking the seal.
- Descale on schedule. Mineral deposits mess up internal valves and degrade seals. Every 3 months or 300 capsules — our descaling guide covers every model.
- Don’t overfill the tank. Max line means max line.
- Handle the tank gently. Don’t drop it or slam it on hard surfaces.
- Check capsule insertion. Always confirm the previous capsule ejected before loading the next one.
Wrapping Up
A leaking Nespresso almost always comes down to one of three things: a full drip tray (check this first — I’m serious), a dirty or worn seal, or a water tank connection problem. All three are easy fixes. No special tools needed. The more serious stuff — cracked internal hoses, failed valves — that’s less common and typically only shows up in older machines. Catch leaks early, prevent water damage to your counter, and the machine runs for years. When in doubt, Nespresso’s warranty and support are honestly some of the best in the appliance business.