Coffee brewing is both an art and a science. Whether you’re a casual morning sipper or a dedicated coffee enthusiast, understanding different brewing methods can transform your daily cup from ordinary to extraordinary. Each technique extracts different flavor compounds, oils, and characteristics from your beans, creating unique taste experiences.
In this comprehensive guide, we’ll explore 12 distinct coffee brewing methods, from the precision of pour-over to the simplicity of cowboy coffee. You’ll learn the science behind each technique, the equipment you need, and how to achieve the perfect brew every time.
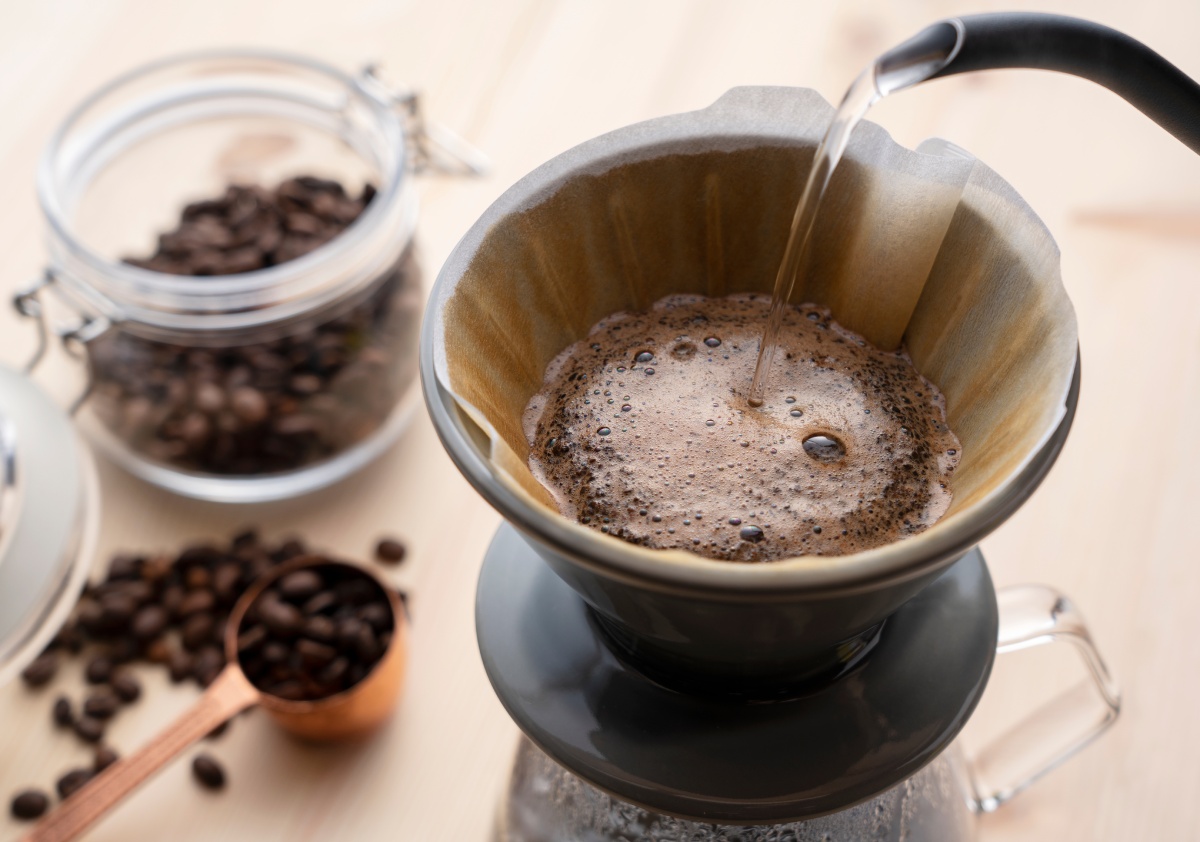
1. Pour Over Coffee: Precision Brewing
Pour-over brewing gives you complete control over every variable in the brewing process. This method involves manually pouring hot water over coffee grounds in a filter, allowing gravity to pull the water through the grounds and into your cup below.
Popular Pour Over Devices
Chemex is known for its elegant hourglass shape and thick proprietary filters that produce exceptionally clean coffee. The thicker filters remove more oils and sediment, resulting in a tea-like clarity with bright, nuanced flavors. Chemex brewers come in various sizes, from 3-cup to 10-cup models, perfect for both solo brewing and entertaining.
Hario V60 features spiral ribs and a large single hole that allows for faster flow and more extraction. The cone shape promotes even saturation, and the brewing speed can be controlled by your pour rate. The V60 is beloved by coffee professionals for its ability to highlight subtle flavor notes in specialty beans.
Kalita Wave uses a flat-bottom design with three extraction holes, promoting even extraction and making it more forgiving for beginners. The wave filter design adds structural support and helps maintain consistent water temperature throughout brewing.
Pour Over Technique
Start with a medium-fine grind, similar to table salt. Use a ratio of 1:16 (1 gram coffee to 16 grams water) as your baseline. Heat water to 195-205°F (90-96°C).
The process begins with the “bloom” – pour just enough water to saturate all grounds (usually twice the weight of coffee) and wait 30-45 seconds. This releases carbon dioxide and allows for better extraction. Then pour in slow, circular motions, maintaining a consistent water level. Total brew time should be 3-4 minutes.
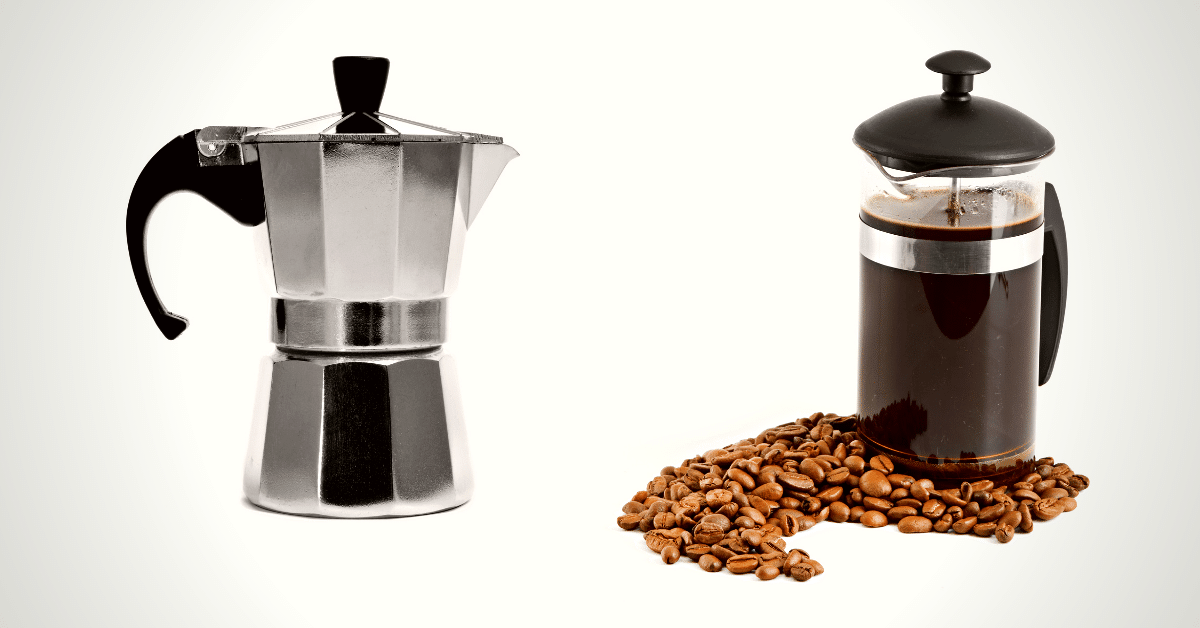
2. French Press: Immersion Brewing
The French press (also called a press pot or plunger pot) is an immersion brewing method where coffee grounds steep directly in hot water before being separated by pressing down a metal mesh filter. This method is prized for producing full-bodied, rich coffee with more oils and sediment than paper-filtered methods.
Why French Press Creates Bold Coffee
Unlike paper filters, the metal mesh allows coffee oils (lipids) to pass through into your cup. These oils carry flavor compounds and create the characteristic body and mouthfeel of French press coffee. You’ll also get more fine particles in suspension, which adds to the texture and intensity.
French Press Brewing Steps
Use a coarse grind—roughly the consistency of breadcrumbs. If ground too fine, particles will slip through the mesh and create sludge in your cup. The standard ratio is 1:15 (coffee to water).
Add grounds to the empty press, then pour hot water (200°F/93°C) to saturate all grounds. Place the lid on with the plunger pulled up, and set a timer for 4 minutes. After steeping, press the plunger down slowly and steadily—forcing it can cause grounds to spurt up around the sides. Pour immediately to prevent over-extraction.
Pro tip: Pour your coffee through a fine-mesh strainer if you want to remove more sediment while keeping the oils.
3. Espresso: Pressure Extraction
Espresso is not a bean or roast—it’s a brewing method that uses high pressure (typically 9 bars) to force hot water through finely-ground, compacted coffee. This process extracts concentrated coffee with complex flavors, thick body, and the signature crema (golden foam) on top.
The Science of Espresso
Espresso extraction happens in three phases: First, the initial drip where water saturates the puck; second, the main extraction where most flavor compounds dissolve; third, the final phase where lighter compounds continue extracting. The entire process takes 25-30 seconds for a standard shot.
Temperature (around 200°F), pressure (9 bars), grind size (very fine, like powdered sugar), and tamp pressure all must work together. Even small variations can dramatically affect taste—too fast and you get sour, under-extracted espresso; too slow produces bitter, over-extracted shots.
Essential Espresso Variables
The “golden ratio” for espresso is typically 1:2 (18 grams of coffee producing 36 grams of liquid espresso in 25-30 seconds). However, preferences vary widely. Some prefer ristretto shots (1:1.5 ratio) for more intensity, while lungo shots (1:3 ratio) offer more volume with lighter body.
Proper grinding is crucial—espresso grinders must be capable of minute adjustments. The coffee should be tamped evenly with about 30 pounds of pressure to create uniform resistance to water flow.
4. Cold Brew: Time-Based Extraction
Cold brew coffee is made by steeping coarsely-ground coffee in cold or room temperature water for 12-24 hours. This extended extraction time creates a fundamentally different beverage than iced coffee (which is hot-brewed coffee that’s been cooled).
Why Cold Brew Tastes Different
Temperature dramatically affects extraction. Hot water quickly extracts both desirable and undesirable compounds. Cold water extracts much more slowly and selectively—it pulls out fewer bitter compounds, acids, and oils while still extracting sweetness and caffeine. The result is smooth, naturally sweet coffee with low acidity.
Cold brew typically has 1.5-2x the caffeine concentration of hot coffee because the brewing ratio uses more coffee and the long steep time extracts more caffeine (which is highly soluble even in cold water).
Making Cold Brew
Use a ratio of 1:4 to 1:8 (coffee to water) depending on whether you want concentrate or ready-to-drink. Coarse grind is essential—fine grounds will over-extract and create bitter, muddy results.
Combine grounds and water in a container, stir to saturate, then cover and let sit at room temperature or in the refrigerator for 12-24 hours. Strain through a fine-mesh sieve lined with cheesecloth or a coffee filter. The concentrate can be diluted with water, milk, or served over ice.
Cold brew concentrate stays fresh refrigerated for up to 2 weeks, making it convenient for batch preparation.
5. AeroPress: Versatile Pressure Brewing
The AeroPress is a relatively new brewing device (invented in 2005) that uses air pressure to push water through coffee grounds. It’s incredibly versatile, portable, and capable of producing everything from espresso-like concentrate to clean filter coffee.
Standard vs Inverted Method
The standard method has you place the AeroPress on top of your mug with a filter in the cap, add coffee and water, stir, then press down. This allows some drip-through during steeping.
The inverted method flips the AeroPress upside down, creating a seal that prevents any drip-through until you’re ready to press. Many enthusiasts prefer this for more control over steep time and stronger extraction.
AeroPress Brewing Variables
Use medium-fine grind (slightly finer than drip). Water temperature can range from 175-205°F depending on desired results—lower temps emphasize sweetness, higher temps extract more aggressively.
Typical recipe: 17 grams coffee, 220 grams water at 200°F. Stir for 10 seconds, then let steep for 1-2 minutes. Press slowly over 20-30 seconds. The gentle pressure (much less than espresso machines) extracts quickly without bitterness.
The AeroPress is beloved by travelers and campers because it’s lightweight, nearly indestructible, and makes excellent coffee anywhere.
6. Moka Pot: Stovetop Espresso
The Moka pot (also called a stovetop espresso maker) was invented in Italy in 1933 and remains a staple in European households. It uses steam pressure from boiling water in a bottom chamber to push water through coffee grounds and into an upper chamber.
How Moka Pots Work
Water in the bottom chamber heats up and creates steam pressure. When pressure builds (around 1-2 bars—much less than espresso machines), it forces water up through a tube, through the coffee grounds in the filter basket, and into the top chamber where it collects.
The result is strong, concentrated coffee—not true espresso (which requires 9 bars of pressure), but similar in intensity and suitable for milk drinks.
Brewing Perfect Moka Coffee
Fill the bottom chamber with pre-heated water just below the pressure valve. This reduces time on heat and prevents metallic tastes. Use medium-fine grind and fill the basket level without tamping—just shake to settle.
Place on medium-low heat. When coffee begins emerging, you’ll hear gurgling and see dark coffee in the top chamber. When you hear a hissing, sputtering sound, immediately remove from heat—this signals all water has been pushed through and continuing will create burnt, bitter flavors.
Moka pots come in sizes from 1-cup (approximately 2 oz, one espresso shot) to 12-cup models for serving multiple people.
7. Siphon Coffee: Theatrical Vacuum Brewing
Siphon brewers (also called vacuum pots) look like laboratory equipment and create a dramatic brewing spectacle. This method uses vapor pressure and vacuum to brew coffee, and when done properly, produces some of the cleanest, most flavorful coffee possible.
The Siphon Brewing Process
A siphon consists of two chambers—one sits above the other. Water in the bottom chamber is heated (by flame, electric, or halogen burner). As water heats, vapor pressure forces it up a tube into the top chamber where coffee grounds await.
After steeping (usually 45-90 seconds), you remove the heat source. As the bottom chamber cools, it creates a vacuum that pulls the brewed coffee back down through a filter, leaving grounds in the top chamber.
Why Siphon Coffee Tastes Exceptional
The vacuum brewing process maintains consistent temperature throughout extraction (around 200°F). There’s no temperature loss from pouring or dripping. The cloth or metal filter allows oils through while removing sediment, creating clean coffee with full body. Many tasters describe siphon coffee as having exceptional clarity and aromatic complexity.
Siphon brewing is popular in high-end Japanese coffee shops where the presentation is as important as the taste.
8. Turkish Coffee: Ancient Tradition
Turkish coffee is one of the oldest preparation methods, dating back to 15th century Yemen and Ottoman Turkey. This method creates intensely strong, thick coffee with grounds suspended in the liquid—you drink them together.
The Turkish Coffee Method
Coffee must be ground extremely fine—finer than espresso, almost to powder. Traditional brewing uses a cezve (also called ibrik), a small pot with a long handle, usually made of copper or brass.
Combine finely-ground coffee, cold water, and sugar (if desired) in the cezve. The ratio is typically 1-2 teaspoons of coffee per 3 oz of water. Slowly heat on low without stirring. As it heats, foam will form on top.
Just before boiling, foam rises dramatically—remove from heat immediately. Let foam settle, then heat again. Repeat this process 2-3 times. This creates the thick foam (köpük) that’s essential to proper Turkish coffee.
Pour into small demitasse cups, grounds and all. Let settle for a minute before drinking. Sip carefully—the grounds remain in the bottom of the cup.
Cultural Significance
Turkish coffee is about the ritual as much as the drink. It’s traditionally served with a glass of water and something sweet. In Turkey, coffee fortune telling (tasseography) interprets patterns left by grounds in the cup.
9. Drip Coffee Maker: Automatic Convenience
Automatic drip coffee makers are the most common brewing method in American homes. While often dismissed by coffee snobs, modern drip machines can produce excellent coffee when used properly with quality beans.
How Drip Coffee Makers Work
Cold water from the reservoir is heated to around 200°F and dripped over coffee grounds in a paper or metal filter basket. Gravity pulls the water through the grounds and filter, and brewed coffee collects in a carafe below. A heating plate typically keeps the coffee warm.
Getting Better Results from Drip Machines
Use medium grind—not too fine (which slows dripping and can overflow) or too coarse (which under-extracts). Follow the manufacturer’s guidelines for coffee amount, typically 1-2 tablespoons per 6 oz of water.
Use filtered water for better taste. Descale your machine regularly—mineral buildup affects water temperature and flow rate.
The biggest issue with drip makers is the heating plate, which continues cooking coffee and creates bitter, stale flavors. If your machine has a thermal carafe instead of a glass carafe on a hot plate, that’s significantly better for maintaining fresh flavor.
Look for drip machines certified by the Specialty Coffee Association (SCA), which meet strict standards for brewing temperature, contact time, and other variables.
10. Percolator: Vintage Comeback
Percolators were standard in American homes before automatic drip makers. They fell out of favor because they tend to over-extract, but they’re making a comeback among campers and those seeking strong, hot coffee without electricity.
Percolation Process
Water in the bottom of the pot boils and rises through a tube, spraying over coffee grounds in a perforated basket at the top. The water drips through the grounds and falls back into the pot, where it’s heated again and recirculated. This cycle continues as long as heat is applied.
The problem with percolators is that coffee is repeatedly re-boiled and re-extracted, which can create bitter, harsh flavors. However, this also creates very strong, very hot coffee that stays warm without a heating element.
Better Percolator Coffee
Use coarse grind to minimize over-extraction. Watch the percolator carefully—once you see the first percolation, reduce heat significantly. Let it perk gently for only 5-7 minutes, then remove from heat immediately.
Electric percolators are easier to control than stovetop models because they have automatic temperature regulation.
11. Cowboy Coffee: Campfire Simplicity
Cowboy coffee is the most primitive brewing method—no equipment needed beyond a pot and heat source. It’s perfect for camping, power outages, or anywhere you need coffee without tools.
How to Make Cowboy Coffee
Bring water to a boil in a pot. Remove from heat and add coarsely-ground coffee directly to the water (about 2 tablespoons per 8 oz water). Return to heat briefly just until it starts to boil again, then immediately remove.
Let the pot sit off heat for 3-4 minutes—grounds will settle to the bottom. Pour carefully, leaving the grounds behind. Some people add a small amount of cold water after brewing, which helps grounds settle faster.
The result is similar to French press—full-bodied with some sediment. It won’t be the cleanest cup, but it’s remarkably good considering the simplicity.
The Eggshell Trick
An old cowboy trick involves adding crushed eggshells with the grounds. The calcium in shells reduces acidity and helps grounds settle. While it works, it’s not necessary—proper grind size and settling time work fine.
12. Vietnamese Phin Filter: Slow Drip Coffee
Vietnamese coffee is brewed using a phin—a small metal filter that sits atop your cup. This slow-drip method creates concentrated, strong coffee that’s traditionally mixed with sweetened condensed milk.
Vietnamese Coffee Brewing
Add 2-3 tablespoons of medium-coarse ground coffee to the phin. Place the filter press on top and gently compress the grounds—not too tight. Place the phin on your cup and pour a small amount of hot water to bloom the grounds (30 seconds).
Fill the phin with hot water and put the lid on. Coffee will slowly drip through—the entire process takes 4-5 minutes. The slow extraction creates thick, syrupy coffee.
For traditional cà phê sữa đá (iced Vietnamese coffee), add 2-3 tablespoons sweetened condensed milk to your cup before placing the phin on top. Once dripping is complete, stir well and pour over ice.
Why Vietnamese Coffee Is Different
Vietnamese coffee culture developed using Robusta beans (higher caffeine, more bitter than Arabica) with French-inspired brewing methods. The strong coffee cuts through the intense sweetness of condensed milk, creating perfect balance.
Essential Equipment for All Brewing Methods
Regardless of which brewing method you choose, certain equipment improves every cup:
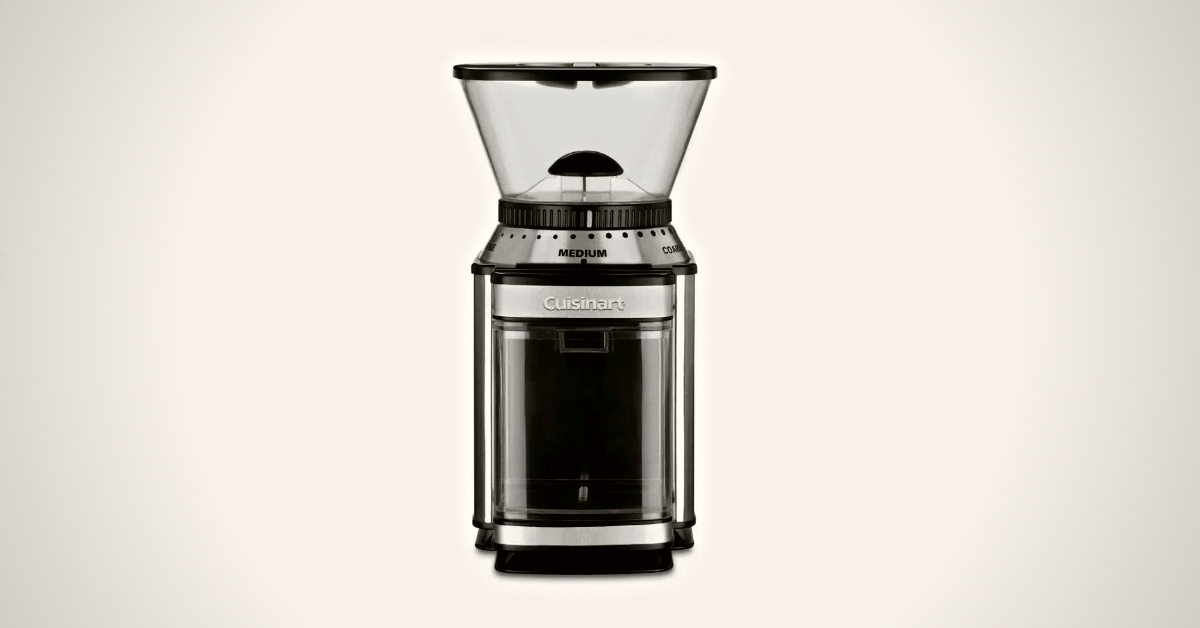
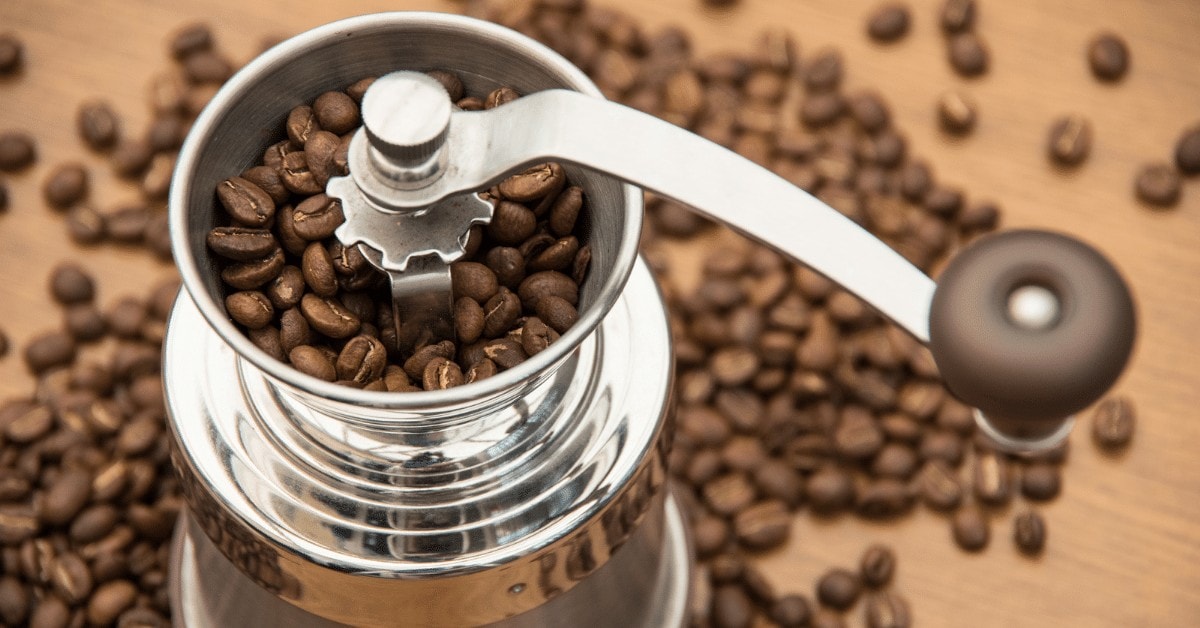
Coffee Grinder
Fresh-ground coffee is dramatically better than pre-ground. Burr grinders crush beans between two surfaces, creating uniform particle size. Blade grinders chop unevenly, leading to inconsistent extraction.
Each brewing method requires specific grind size—having a quality adjustable grinder lets you optimize for any method. Manual grinders are affordable and portable, while electric burr grinders offer convenience and consistency.
Kitchen Scale
Measuring coffee by weight instead of volume ensures consistency. Coffee density varies by roast level and bean origin—a scoop of light roast weighs less than a scoop of dark roast. A scale eliminates guesswork.
Look for scales that measure in 0.1-gram increments and have a timer function for tracking extraction time.
Gooseneck Kettle
For pour-over methods, a gooseneck kettle gives you precise control over water flow rate and placement. The narrow spout allows for slow, circular pours that evenly saturate grounds.
Electric gooseneck kettles with temperature control are worth the investment—different coffees extract optimally at different temperatures (typically 195-205°F).
Choosing Your Brewing Method
The best brewing method depends on your priorities:
For speed and convenience: Drip machine or AeroPress (2-4 minutes)
For full body and richness: French press or Moka pot
For clean, nuanced flavors: Pour-over (Chemex, V60) or siphon
For cold coffee: Cold brew (12-24 hours, but minimal active time)
For espresso drinks: Espresso machine or Moka pot
For travel/camping: AeroPress, cowboy coffee, or portable pour-over
For ritual and experience: Siphon, Turkish coffee, or pour-over
For budget-friendly: French press, pour-over dripper, or Moka pot
Water Quality Matters
Coffee is 98% water, so water quality profoundly affects taste. Ideal brewing water has moderate mineral content—too soft produces flat coffee, while too hard creates chalky, dull flavors and scale buildup.
If your tap water tastes good on its own, it will make good coffee. If it has chlorine, metallic, or off flavors, use filtered water. Avoid distilled water, which lacks minerals needed for proper extraction.
Storage and Freshness
Coffee degrades rapidly after roasting due to oxidation, moisture, and carbon dioxide loss. For best results:
- Buy whole beans and grind just before brewing
- Store in an airtight container in a cool, dark place
- Use within 2-3 weeks of roasting for peak flavor
- Never refrigerate or freeze coffee—moisture and condensation cause staling
- Only buy what you can use within 2-3 weeks
Conclusion
Exploring different brewing methods transforms your relationship with coffee. Each technique extracts different characteristics from the same beans—the bright acidity of pour-over, the heavy body of French press, the intensity of espresso, and the smoothness of cold brew all come from different extraction processes.
Start with one method that fits your lifestyle and equipment budget. Master the fundamentals—proper grind size, water temperature, and brewing ratios. Once you have consistency, experiment with variables to discover your perfect cup.
The joy of coffee isn’t just in drinking—it’s in the process, the ritual, and the endless discoveries along the way. Whether you choose the precision of pour-over or the simplicity of cowboy coffee, the best brewing method is the one that makes you excited to wake up and brew your next cup.
Contains affiliate links. As an Amazon Associate, we earn from qualifying purchases at no cost to you.